# CRUD Resources
# Overview
Ever wish you could create, update and delete your app's database resources using a slick UI? What about easily running bulk operations against specific entities in your database? Look no further!
Coravel Pro gives you an easy way to generate a CRUD interface for you to manage your app's data and entities!
TIP
This is intended as an admin tool, not as a customer/client facing tool.
# Creating A Resource
Create a class that inherits from Coravel.Pro.Features.Resources.Interfaces.IResource;
Next, you will want to inject your database access mechanism (e.g. EF Core DbContext) via your class' constructor so that you can save, delete, etc. to your database.
private ApplicationDbContext _db;

public BlogPosts(ApplicationDbContext db) =>
  this._db = db;
TIP
Coravel will automatically detect these classes and display a new menu item for each one! There's no need to tinker with configuring these classes with the service provider 👍.
# IResource Methods
Your new CRUD resource will have to implement the following methods:
# Select
public IQueryable<object> Select(string filter)
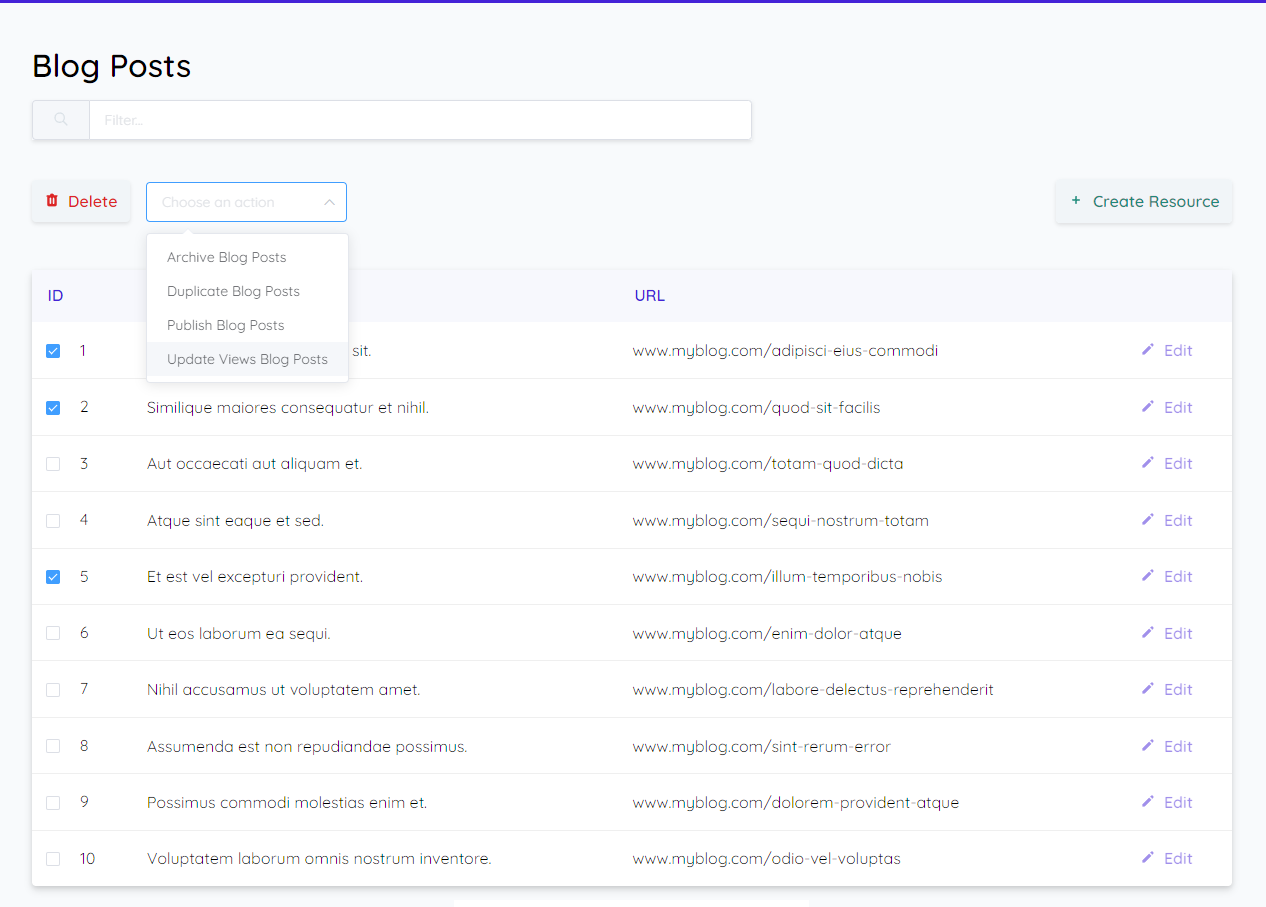
This is where you select a subset of your model's data to show for each record on the UI when listing your entities (see image at top of page).
Each property you select will become a column on the table and each data record becomes a row (auto-magically!).
WARNING
Do not fetch the data - only return an IQueryable<object> so that Coravel Pro can fetch the data for you. This allows paging your data in the HTML table.
public IQueryable<object> Select(string filter)
{
    return this._db.BlogPosts.Select(p => new {
        p.Id,
        p.Title,
        p.Url
    });
}
# Search Filter
The string filter parameter is the text that you put into the search bar at the top of the CRUD resources page.
public IQueryable<object> Select(string filter)
{
    return this._db.BlogPosts.Select(p => new {
        p.Id,
        p.Title,
        p.Url
    })
    .Where(p => string.IsNullOrEmpty(filter) || p.Title.Contains(filter));
}
# Selectable Field
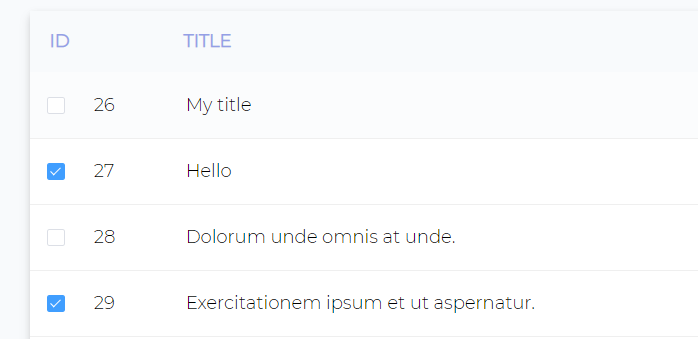
The first property you decide to use (in the case above it's p.Id) will be used for the checkbox values on the UI. For this reason, you most likely want to make this your entity's identity field.
These values will be passed into other methods you will be building (keep reading 😉).
# DeleteAsync
public Task DeleteAsync(IEnumerable<string> ids)
Whenever you "check" one or more of the entities in the CRUD resource's table, you can choose to delete them.
public async Task DeleteAsync(IEnumerable<string> ids)
{
    this._db.BlogPosts.RemoveRange(
        ids.Select(id => new BlogPost() { Id = int.Parse(id) })
    );
    await this._db.SaveChangesAsync();
}
TIP
Notice that the ids parameter is a collection of string. This is so you can convert/parse the values to whatever you need (int, GUID, etc.)
# Fields
public IEnumerable<IField> Fields()
On the right hand side of the UI you'll see a "Create Resource" button.

This will bring you to a dynamically generated HTML form. By implementing the Fields method, you can tell Coravel Pro what fields you want to make available in your form!
Coravel Pro comes with pre-configured field classes found in the Coravel.Pro.Features.Resources.Fields namespace.
public IEnumerable<IField> Fields()
{
    return new IField[] {
        new Section("My Panel", new IField[] {
            Text.ForProperty("Id"),
            Text.ForProperty("Title"),
            Text.ForProperty("Url")
        })
    };
}
Each field (except for Section) has a method ForProperty. The value supplied should verbatim match the specific property on your model that you want to use/map.
Also, as a recommended rule, always include the Id field of your entity (you'll need it later when updating your entity).
WARNING
Recommended rules:
- Match entity property names verbatim for each field
- Include the identity property in your fields collection
# Section
This is a wrapper field where you can split your form into multiple parts, if you wish.
new Section("My Section", new IField[] { /* Your fields */ })
It's constructor accepts:
- Title to display
- Collection of the
IFieldentries to display inside the section.
You can have as many sections as you need!
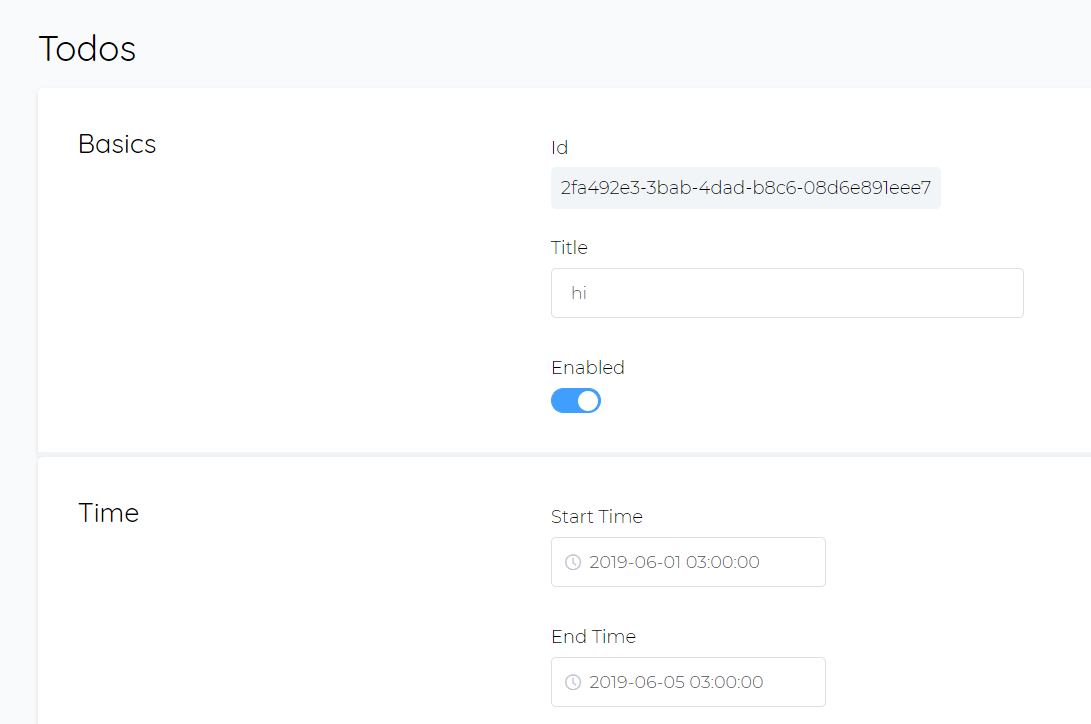
# Read-only
Useful when you want to display a value on the form that cannot be changed (usually an Id).
Readonly.ForProperty("Id")
# Text
Useful for text fields in general.
Text.ForProperty("Title")
# Boolean
Useful for any boolean types. Will display as a switch on the UI.
Boolean.ForProperty("Enabled")
# Date
Useful for dates. It is recommended to use in conjunction with DateTimeOffset.
Date.ForProperty("StartDate")
# DateTime
Useful for storing a specific date and time of day (in 24hr format). It is recommended to use in conjunction with DateTimeOffset.
DateTime.ForProperty("EventTime")
# Time
Useful for storing a specific time of day (in 24hr format). It is recommended to use in conjunction with DateTimeOffset.
Time.ForProperty("StartTime")
# DropDown (HTML Select)
When you have a list of selections to make you can list them as an HTML select.
DropDown.ForProperty("UserType")
    .WithDropDownOptions(new DropDownOption[] {
        DropDownOption.Create("Admin", UserTypesEnum.Admin.ToString()),
        DropDownOption.Create("Editor", UserTypesEnum.Editor.ToString()),
        DropDownOption.Create("Viewer", UserTypesEnum.ReadOnly.ToString())
    })
# Multi-Select DropDown
By chaining the EnableMultiSelect() method on the DropDown field (above), you can allow multiple selectable options from the rendered dropdown field:
DropDown.ForProperty("UserType")
    .EnableMultiSelect() // <------ Right there!
    .WithDropDownOptions(new DropDownOption[] {
        DropDownOption.Create("Admin", UserTypesEnum.Admin.ToString()),
        DropDownOption.Create("Editor", UserTypesEnum.Editor.ToString()),
        DropDownOption.Create("Viewer", UserTypesEnum.ReadOnly.ToString())
    })
TIP
When getting the saved value in the CreateAsync and UpdateAsync methods, the string will be a comma-separated list of all the values the user selected.
# Raw HTML
Similar to the Readonly field, you can inject raw read-only HTML into your form by using the RawHTML field.
You can inject a value from your EF Core entity model:
RawHTML.ForProperty("SomeProperty");
Or, you can inject hard-coded HTML into a form:
RawHTML
    .ForProperty("Warning")
    .WithHTML("<div style='color: red;'>This is warning.</div>");
TIP
If you need to display data from your entity that's computed in a more complex way, then you can use the FindAsync method to build your object via a computed property.
public async Task<object> FindAsync(string entityId)
{
    var post = await this._db.BlogPosts.FindAsync(int.Parse(entityId));

    var computedHtml = await this._api.FetchInfoFromExternalService(entityId);

    return new {
        Title = post.Title,
        Content = post.Content,
        HTML = computedHtml
    };
}
Then, using the field:
RawHTML.ForProperty("HTML");
# CreateAsync
public Task CreateAsync(IDictionary<string, object> formData);
Once you fill in your HTML form and click "Save New Resource", this method will help you to store the selected values.
Each value is passed in as a key/value in the IDictionary parameter.
You will most likely have to parse each value before storing them.
public async Task CreateAsync(IDictionary<string, object> formData)
{
    var post = new BlogPost();

    post.Title = formData["Title"] as string;
    post.Url = formData["Url"] as string;

    await this._db.AddAsync(post);
    await this._db.SaveChangesAsync();
}
TIP
The names of the fields you created become the keys that you will receive here.
# FindAsync
public Task<object> FindAsync(string entityId)
Once you create and save a new resource, you have the ability to edit it via the UI.
In order for Coravel Pro to know what data to use, it will use the FindAsync.
public async Task<object> FindAsync(string entityId)
{
    return await this._db.BlogPosts.FindAsync(int.Parse(entityId));
}
You don't have to return the entire entity. You can return an anonymous object that has only the fields required for updating via the UI.
TIP
Notice that the parameter is a string. You will most likely have to parse this to fit the type of your entity's Id.
# UpdateAsync
public Task UpdateAsync(IDictionary<string, object> formData)
Similar to the CreateAsync method, whenever you are updating an existing CRUD resource this method will be supplied the selected values from the UI.
WARNING
Remember to make sure that one of the fields you supplied in the Fields method is the Id. This is where the Readonly field comes in handy 😉.
public async Task UpdateAsync(IDictionary<string, object> formData)
{
    // Find the entity
    var id = int.Parse(formData["Id"].ToString());
    var post = await this._db.BlogPosts.FindAsync(id);

    // Update it
    post.Title = formData["Title"] as string;
    post.Url = formData["Url"] as string;

    this._db.Update(post);
    await this._db.SaveChangesAsync();
}
# Bulk Actions
Coravel Pro allows you to perform bulk actions against your entities!
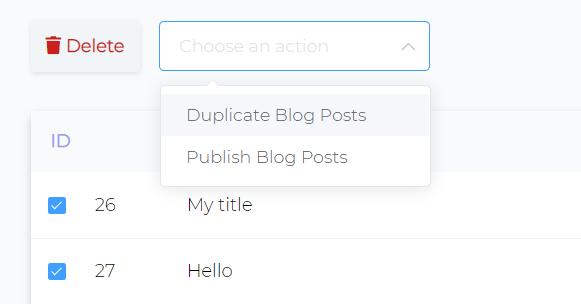
When viewing the list of your CRUD resources and you check-off one or more rows, you can select a bulk action to execute on the selected resources.
# Creating An Action
First, create a class that implements IResourceAction<T> where T is one of the IResource classes you've made.
Pass in any required dependencies via the constructor (EF Core DbContext, API services, etc.).
Then, implement the InvokeAsync method.
That's it!
Coravel Pro will automatically detect your new class. When viewing the appropriate CRUD resource, you will see your new action added to the available actions dropdown.
public async Task InvokeAsync(IEnumerable<string> ids)
{
    var postsToDuplicate = await this._dbContext.BlogPosts
        .Where(p => ids.Contains(p.Id.ToString()))
        .ToListAsync();

    var duplicated = postsToDuplicate.Select(p => new BlogPost()
    {
        CreateAt = DateTime.UtcNow,
        Title = p.Title,
        Url = p.Url
    });

    await this._dbContext.AddRangeAsync(duplicated);
    await this._dbContext.SaveChangesAsync();
}
TIP
Here are some ideas for your actions:
- Synchronize selected records with an external system
- Publish records to an external system
- Combine the selected records and create a new kind of entity
- Generate a report of the given records and email to users
- Lock out users from your app
- etc.
# Searching
As mentioned, by using the search box at the top of any CRUD resource page, you can filter through your entities to quickly find the ones that you need to tinker with!

# Resource Restrictions
Sometimes, you want to limit what UI actions can be done to certain entities/resources.
Coravel Pro gives you a few options to restrict what actions are allowed from the UI:
| Remove Functionality | Interface |
|---|---|
| Create | ICannotCreateResource |
| Edit | ICannotEditResource |
| Delete | ICannotDeleteResource |
| Bulk Actions | ICannotTriggerBulkActions |
By adding the appropriate interface(s) to your CRUD resource class, Coravel Pro will take appropriate action!